Greetings and a good Saturday morning to all! Hope everyone has had a good week.
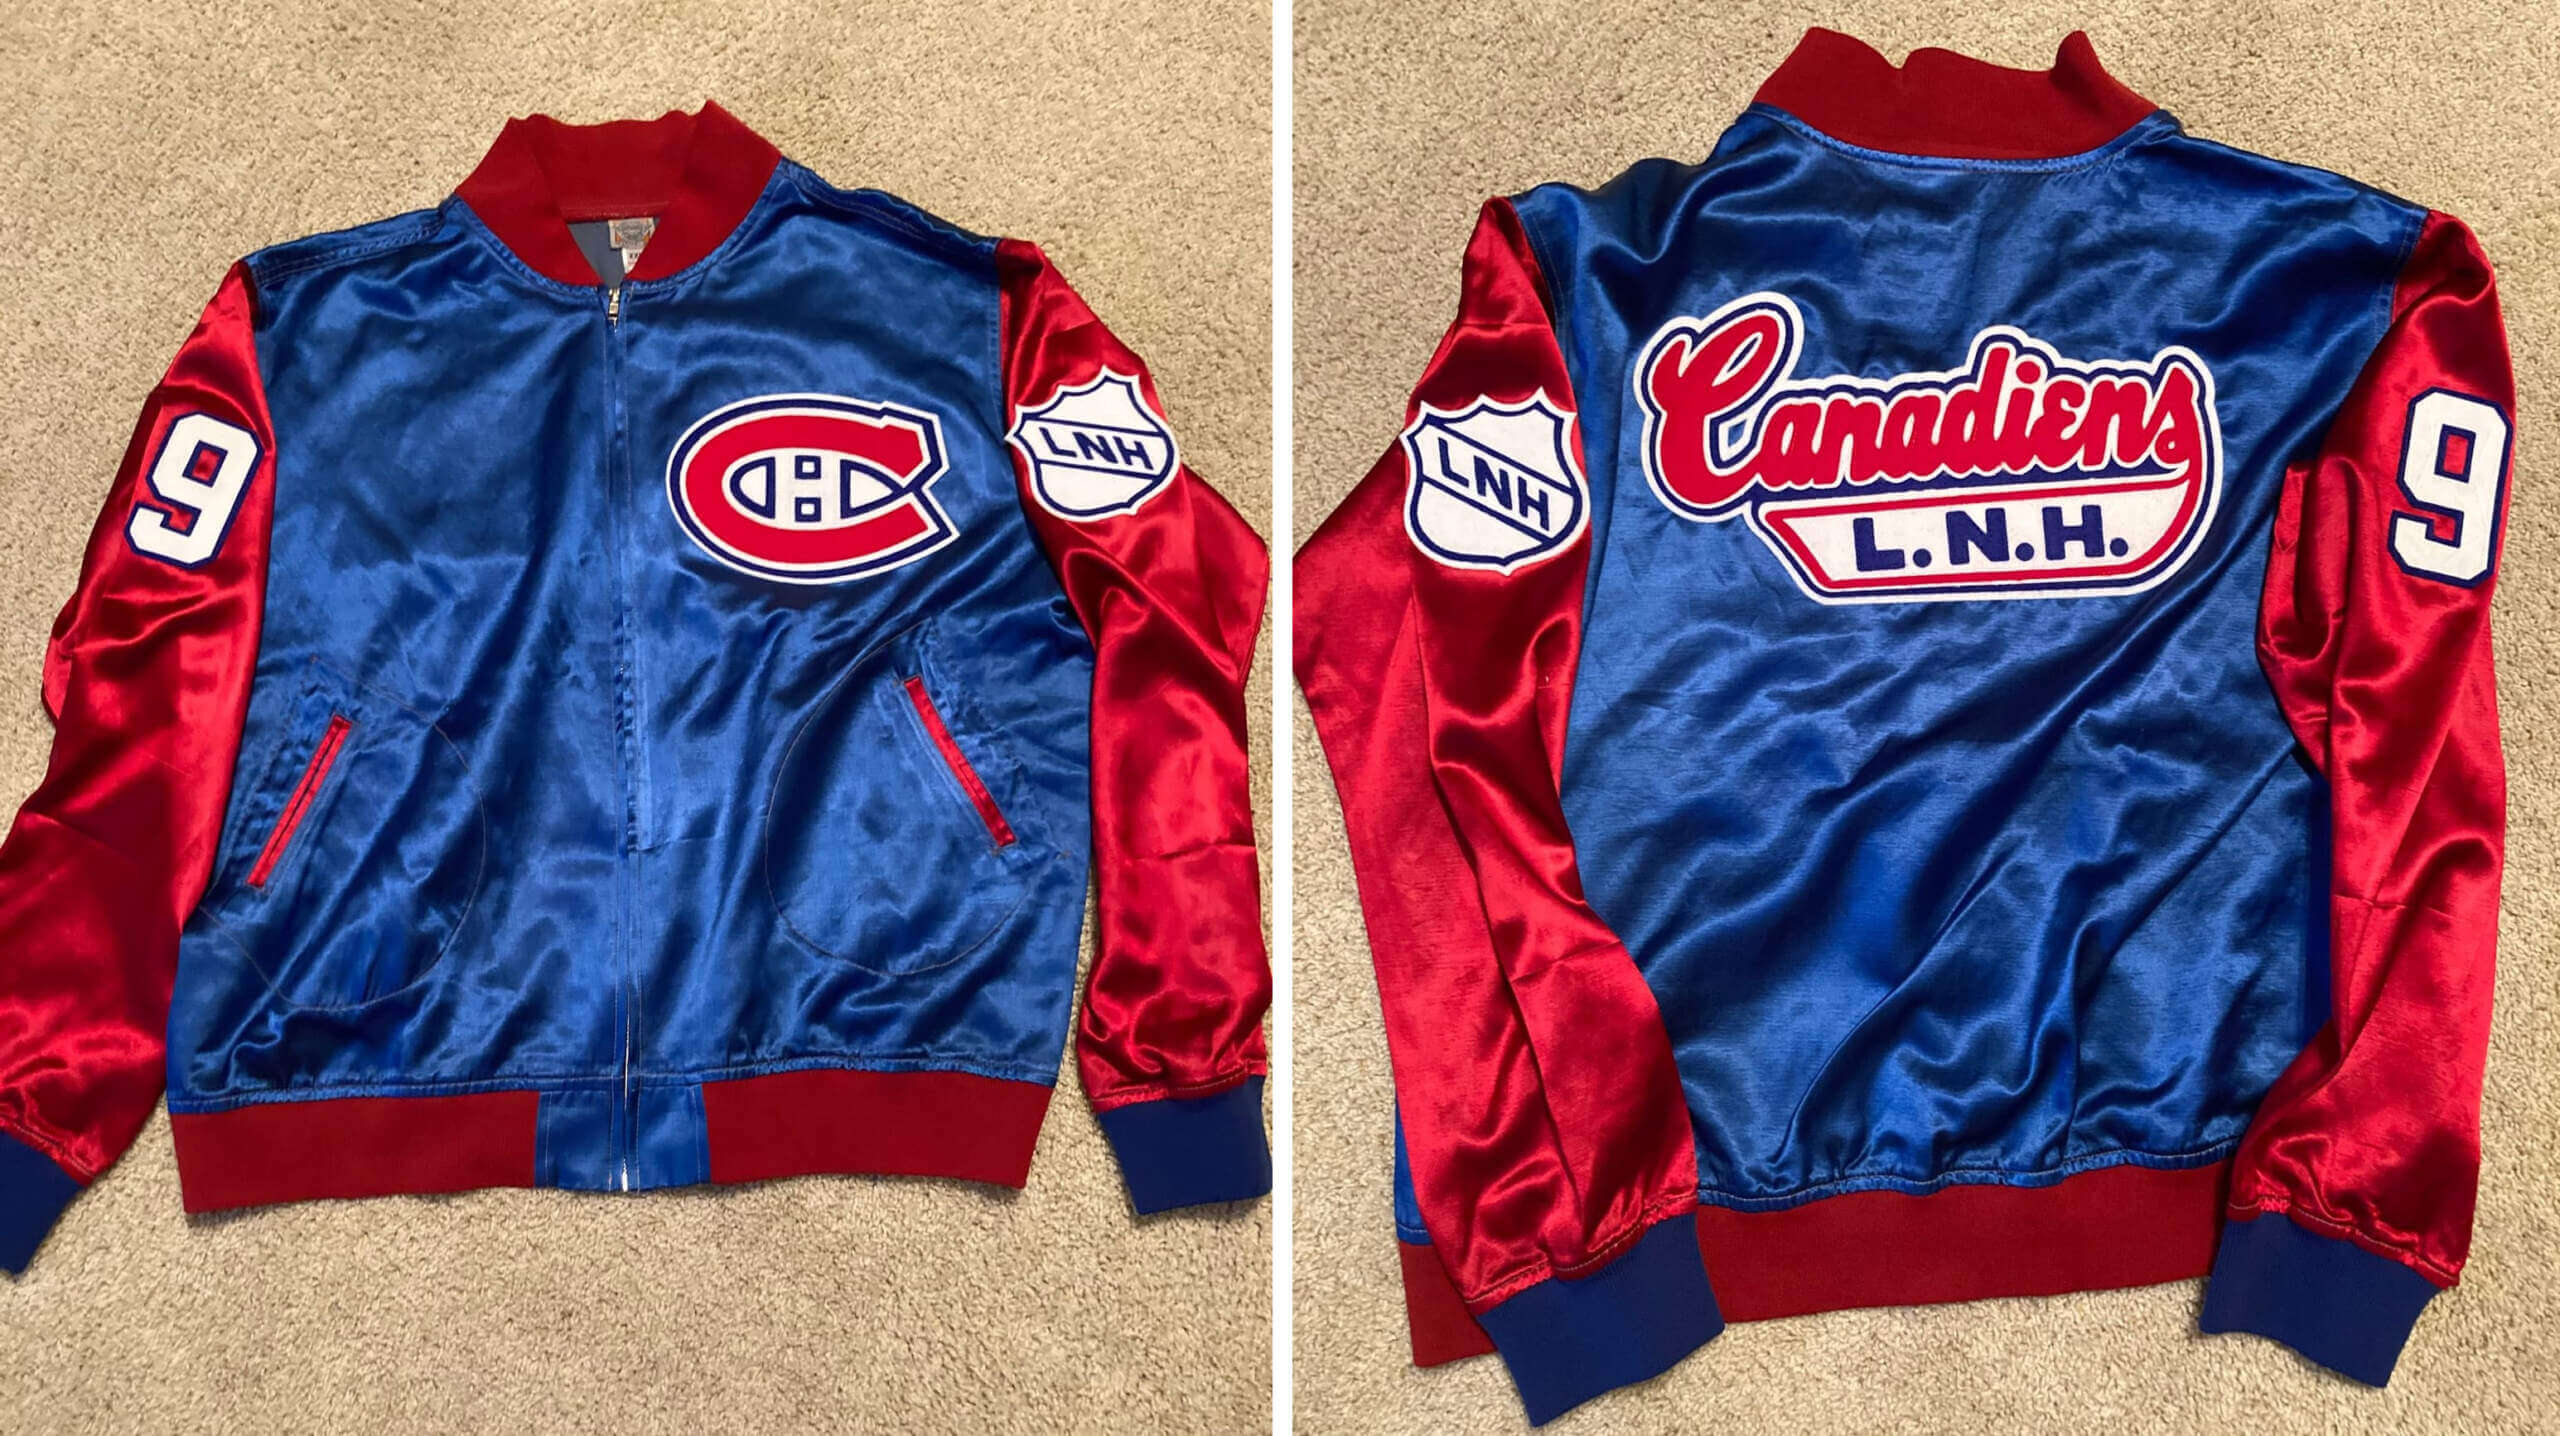
If today’s splash photo looks somewhat familiar to you — it’s because we’ve seen it on Uni Watch before. In fact, that awesome DIY Canadiens jacket was the creation of Todd Morss, and it was featured by Paul in an article about a year and a half ago.
Fast forward to the launch of Uni Watch Plus about a month ago. Todd was one of the first to sign up for our new service, and he immediately began posting in the message boards. There, he showed off some of his creations, the first of which was a Canton Bulldogs shirt:
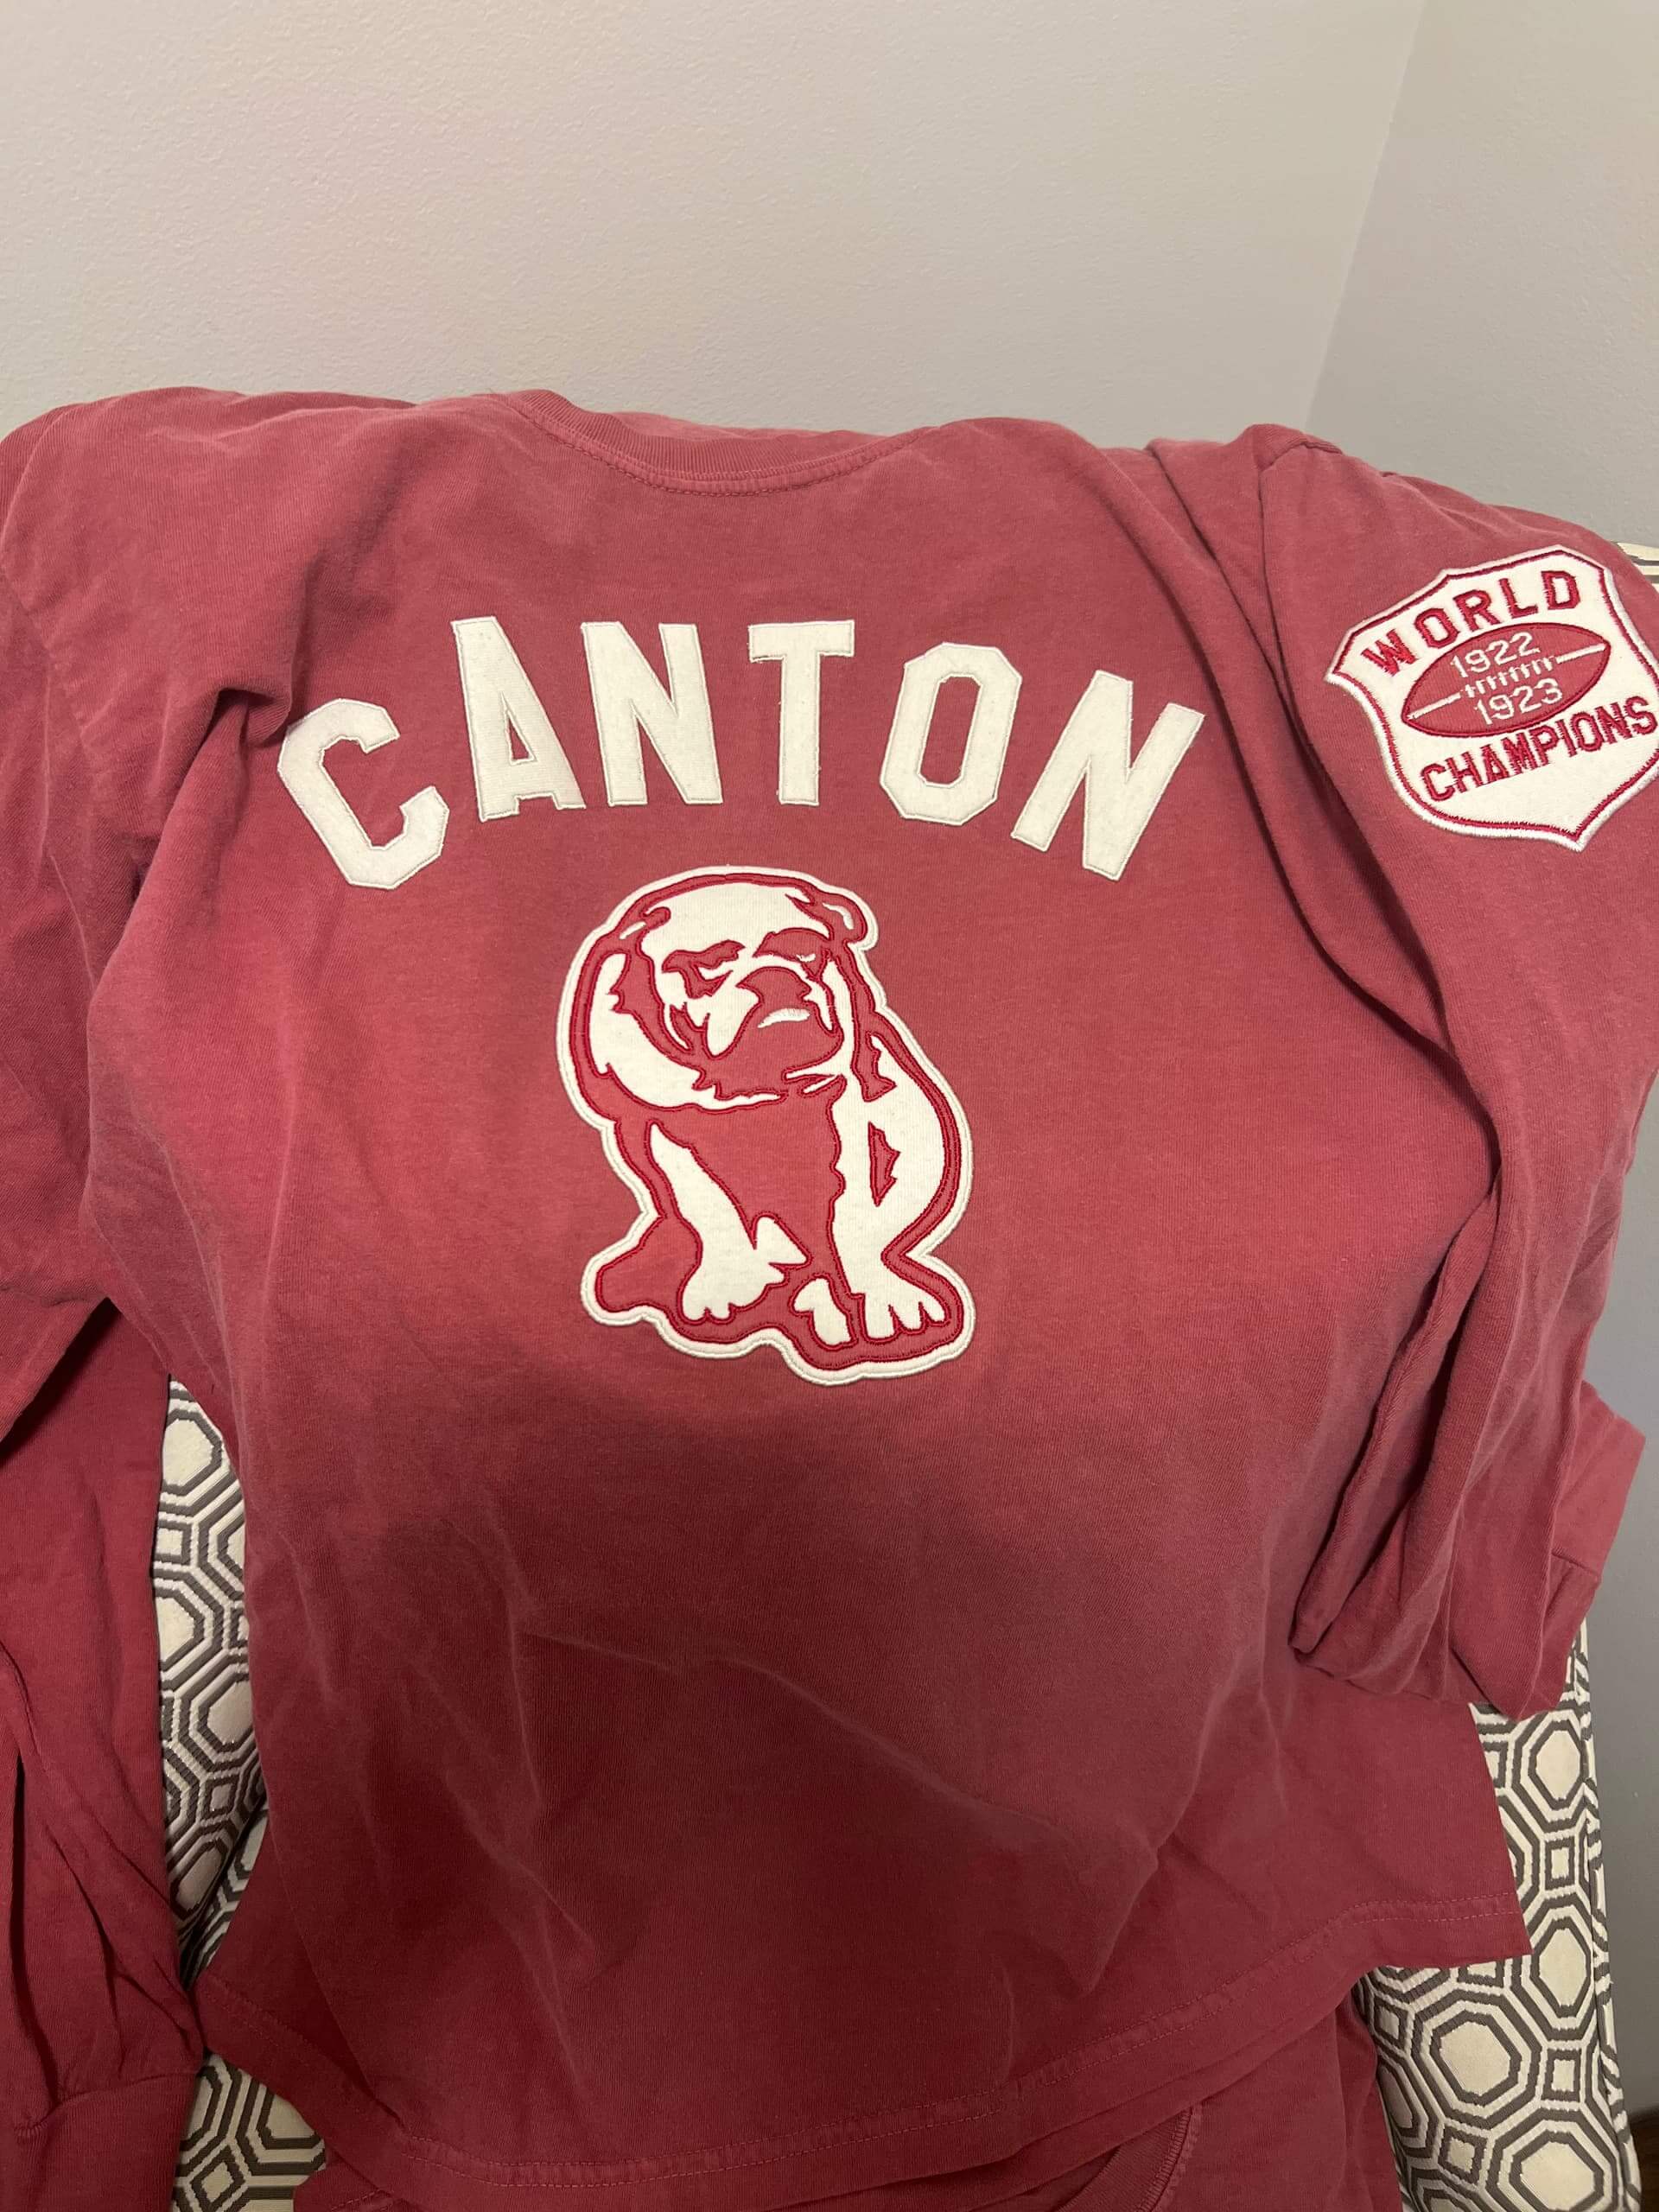
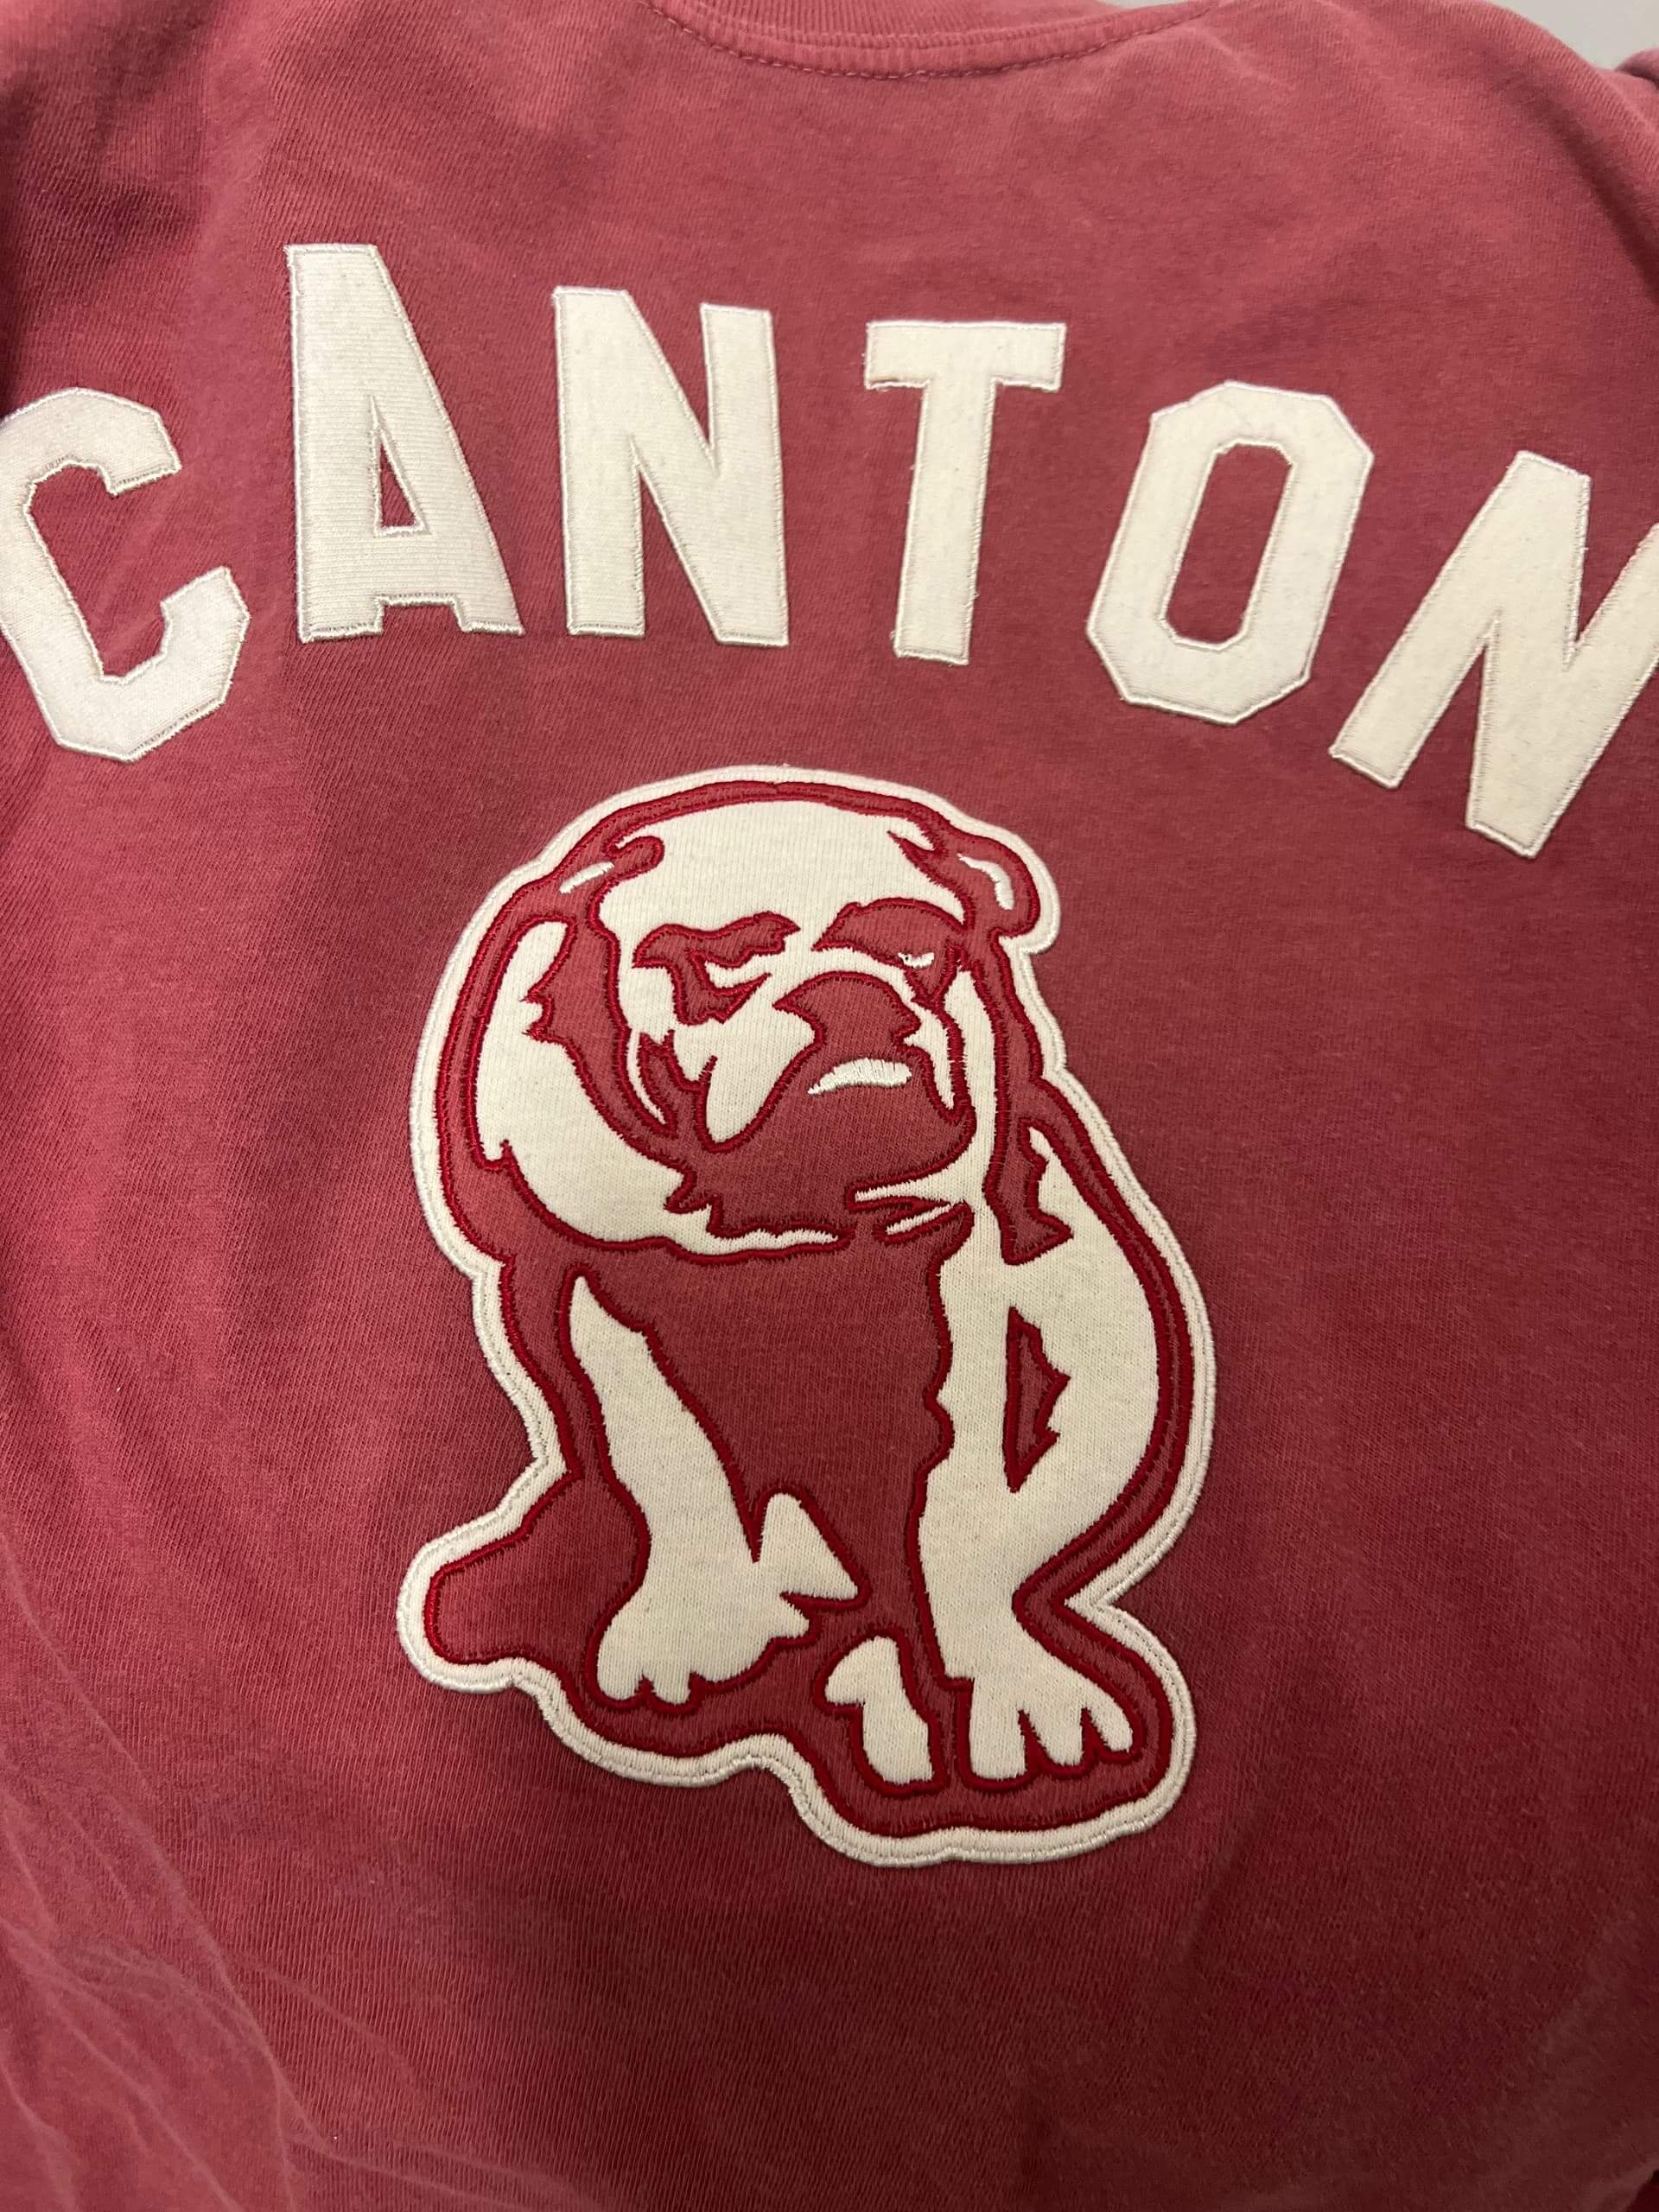
Todd described it as “Canton Bulldogs champions shirt for a friend. Self fabric cotton shirt patches and lettering, done on an embroidery machine. If you guys don’t want to see the stuff that was more automated, let me know and I won’t show them.”
He added a few more of his creations later in that thread. These next two in particular caught my eye:


“Here are a couple of 60s and 70s tigers shirts. The grey I wanted to have the team issued look, so I used the road jersey lettering and the one year script. On the sleeve is the more flowing D that was used on the caps in the mid 60’s.”
I’ve always loved that one-year-wonder 1960 Detroit Tigers home script. I know the Olde English “D” qualifies as iconic, so I can see how the blowback from fans caused them to return to it, but I always thought it was quite a spiffy looking script.
Within that thread, Todd posted even more of his creations, including the Canadiens jacket that Paul wrote about, as well as a very cool “remake of a shirt that the Dupuis Freres Stores in Quebec sold in the 50’s. At that point, Todd shared some of his “secrets” showing how he does three-color numbers. Needless to say, I was particularly impressed with the vertically arched lettering he produced.
Finally, in a separate post entitled “Christmas/Holiday Cards,” Todd wrote “I haven’t done cards in a few years and for some reason I really feel like doing them this year. Here’s what I came up with. It’s not quite fully polished, but I’d say it’s 90% of the way there. And yes, that’s my daughter’s face in the mask. Let me know what you guys think!”
The accompanying photo blew me away:

At this point, I decided I needed to have Todd give us the rundown on one of his creations and how he went about creating it, as well as how he got started. He chose a Toronto Maple Leafs hockey shirsey, and took us through the process. Here’s Todd:
by Todd Morss
I’ve been tinkering with jersey design since the first time I could hold a marker. My early working career was spent in sporting goods stores and I gained a working knowledge of how do do jersey lettering and design. I’m a self-taught graphic designer who now does sports design and customization for a successful screen printing company (Liquid Custom Apparel, in Canton, Ohio). I often refer to my job as “What I should have been doing 20 years ago”.
In 2006 I started doing jersey customizations as a side hustle, and over the course of a few years I ended up building a portfolio and skill set that is fairly unique to my area. One of my sources of pride is that the teams we supply are noticed because they aren’t wearing basic stock letters and numbers and always have a more professional look to them.
I’ve always been drawn to the more handmade look of the 40s-early 60s leaf logo, so I went ahead and made a version of that instead of a sharper version.


Put the inner color layer down first to make sure my top layer leaves me with absolutely exact outlines. What you see here is an example of kiss-cutting the layer.


I know Paul talks about the benefits of Uni Watch Plus fairly regularly, but I’m especially loving the message boards — and I’d hope many more of you would make use of them. So many of our readers have incredible stories and talents, and it’s the boards are a great place to share those. Not only that, it’s just a great place to meet and greet your fellow Uni Watchers (let’s face it…we’re a group with a fairly unique set of interests, and there’s no better place to uni-geek out than with others who have a commonality!). Had it not been for the boards, I’d have only known of Todd from his one article with Paul, but through the boards (and now, in our e-mails), I’m getting to know Todd, and he’s a very talented, stand-up guy. I encourage everyone who has signed up for UW+ to visit the message boards, and if you haven’t joined, it’s one of the better benefits!

Splendid piece. Todd’s projects look like the stuff I’d surround myself with were I more tech-savvy. I’m a hand-made sort of guy but that’s more circumstance than by design.
Todd’s work is really terrific. If I had to pick a favorite it would be that Canton Bulldogs shirt.
Great stuff as always from Todd!
Very nice work, Todd!
All of Todd’s work is outstanding. I especially admire the bespoke design service for teams. It’s one thing to have access to the materials, equipment and software and another to have the inspiration and ability to produce such amazing designs.